My precious 5 year old wanted a "Flower Birthday Party" in the middle of the winter! Talk about taxing my brain. I figured there was no way I was going to buy hot house flowers and I don't have anything blooming in the yard, so this was going to be a faux flower party all the way. I knew I needed to make things simple since I'm still in a waking-in-the-middle of the night to feed the baby fog.
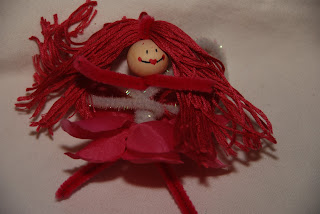
The first thing we decided on was this cute craft from Family Fun. It came all in a kit that was clearanced after Christmas. They are flower fairies! You use pipe cleaners, a wooden bead, embroidery floss and silk flowers to make them.
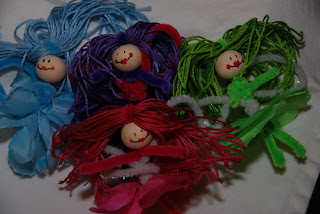
My sweet friend, Liz, colored all the faces ahead of time so all the girls had to do was assemble them. One pipe cleaner folded in half to make the body and legs. Thread the pipe cleaner through the bead and attach the "hair" in place in the top loop before you pull it all the way down tight against the bead. Use a whole skein of floss and then cut the looped ends once you get it attached. Twist the body together in the middle under the bead. Use a second pipe cleaner cut in half to make the arms. Just wrap them around the "body" right under the head bead. Optional, use another pipe cleaner (sparkly white was the favorite here) to create wings, aka loops around the body. Pull on her skirt of a couple of silk flower petals, then twist her legs to keep everything in place. Precious!
Course I also made a flower cake. I wanted to make
this one large flower in pink, but Banana Girl would hear none of that. She wanted day-glo colors and "a lot of flowers". It almost looked like a came from a bakery, which frightens me since I don't like that look, but it made her happy.
We also made flower rings and pins. I just bought a couple of bunches of silk flowers. Then I took them apart by pulling them off the plastic stems. I got a package of ring bases and pin backers from Hobby Lobby. We let the girls pick their flowers and then I hot glued them to the bases and backers. I loved the pins! I even wore mine to church the next day it's so cute. Banana Girl wore her yellow one with a green pom pom in the middle for days.
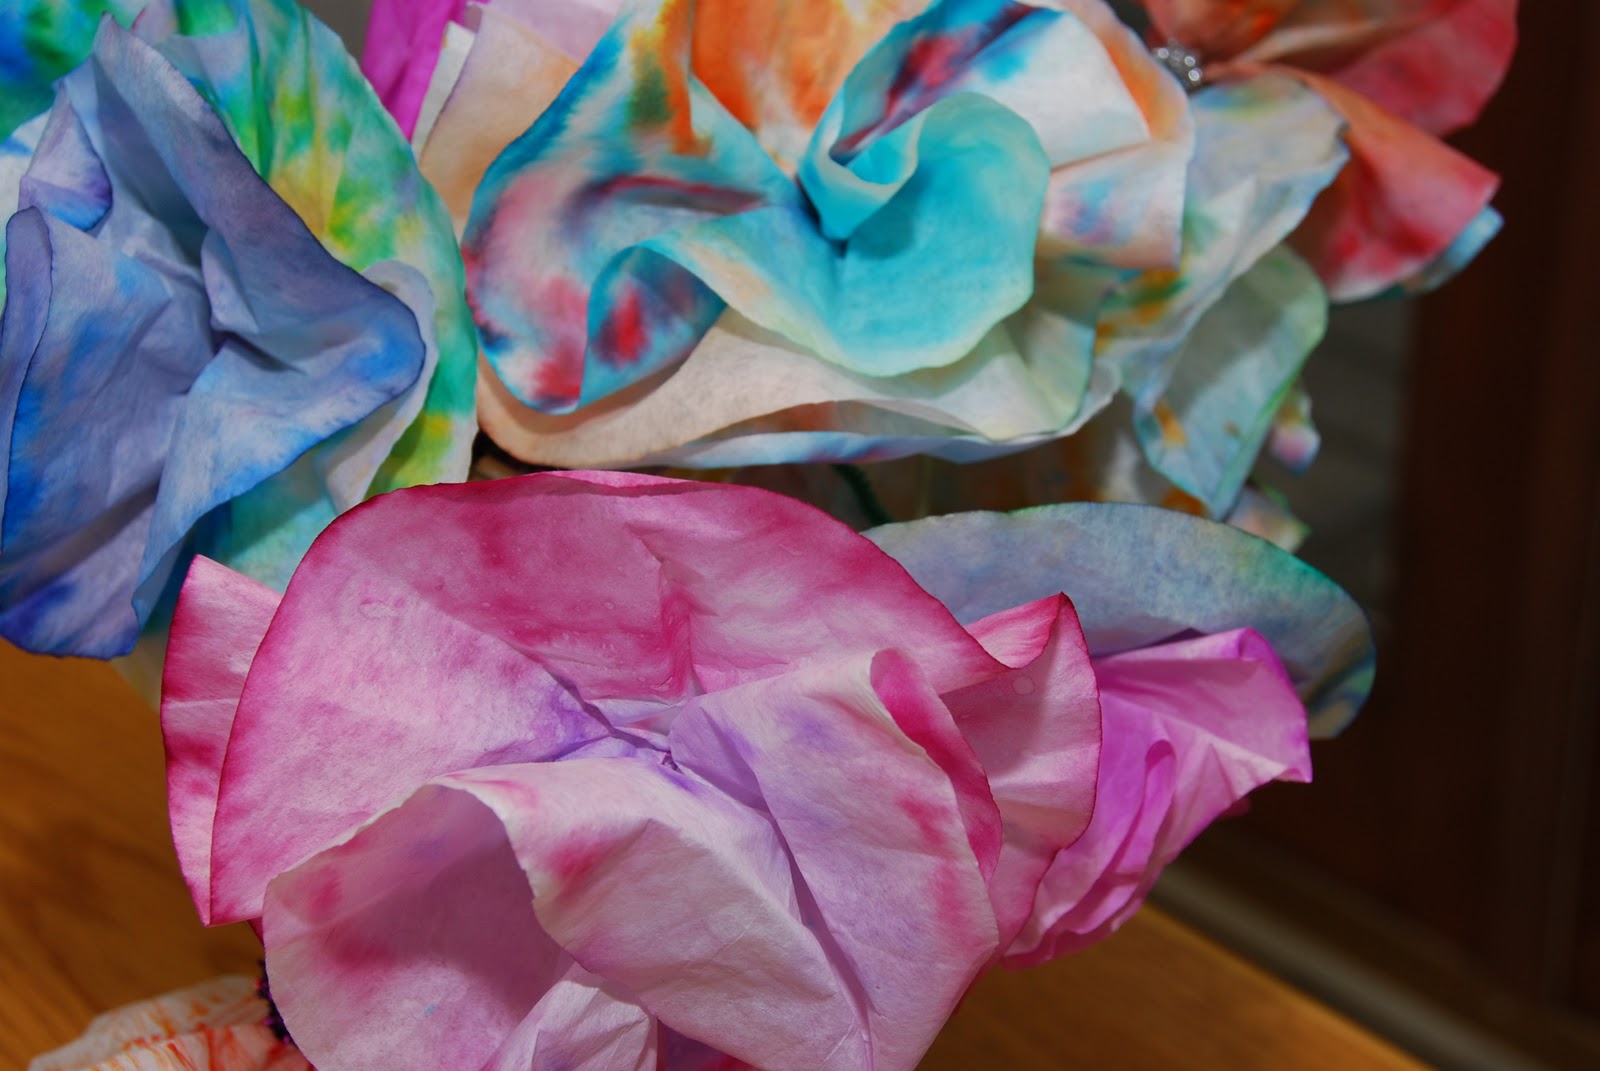
The craft that really won over the adults and kids alike was the coffee filter flowers. These are great for any age, even my two year old made some.
Coffee Filter Flowers
flat bottomed white coffee filters
washable markers
a spray mister bottle filled with water
pipe cleaners
Have kids color the filers any which was they want with really any colors, although you might want to take the black and brown markers out of their selection.
After they have colored the filter, spray it with water. A little water and you'll see the coloring lines a lot of water and they will all blur together in a beautiful watercolor. The one below was colored with purple and blue marker.
Let the filters dry which doesn't take long in a warm sunny area. Then bunch up the filter and attach a pipe cleaner to the middle underneath to make a stem.
These come out really pretty no matter the artists abilities, which is good because I'm NO artist! We have used the finished flowers as Mother's Day presents for Grandma, attached them to a teacher card and given them to neighbors as a get-well present. Really anytime you would send real flowers, you can whip these up with the help of your kids. Who knew flowers were so affordable even in the dead of winter!